New Features of vRealize Operations 6.0

During VMworld Barcelona in October, VMware announced the upcoming release of vRealize Operations 6.0, the latest in the new vRealize product line. As most are aware, the vRealize suite is a rebranding and updating of many of the vCenter management products. Simply put, vCenter Operations Manager will now be vRealize Operations Manager (vROps) starting with the 6.0 release.

The General Availability for vROps 6.0 was December 9, making this now available for the public to download and deploy into their own environments. I am super excited about this version with its impressive new capabilities. Over the next few months, I will share some of my own observations about the new features, updates to old features, enhanced interface, and experiences with the more efficient and effective virtual management in my environment.

Just a quick overview for now, here are some of the major capabilities and a selection of the new features of this version (mostly taken from VMware’s marketing):

Intelligent Operations

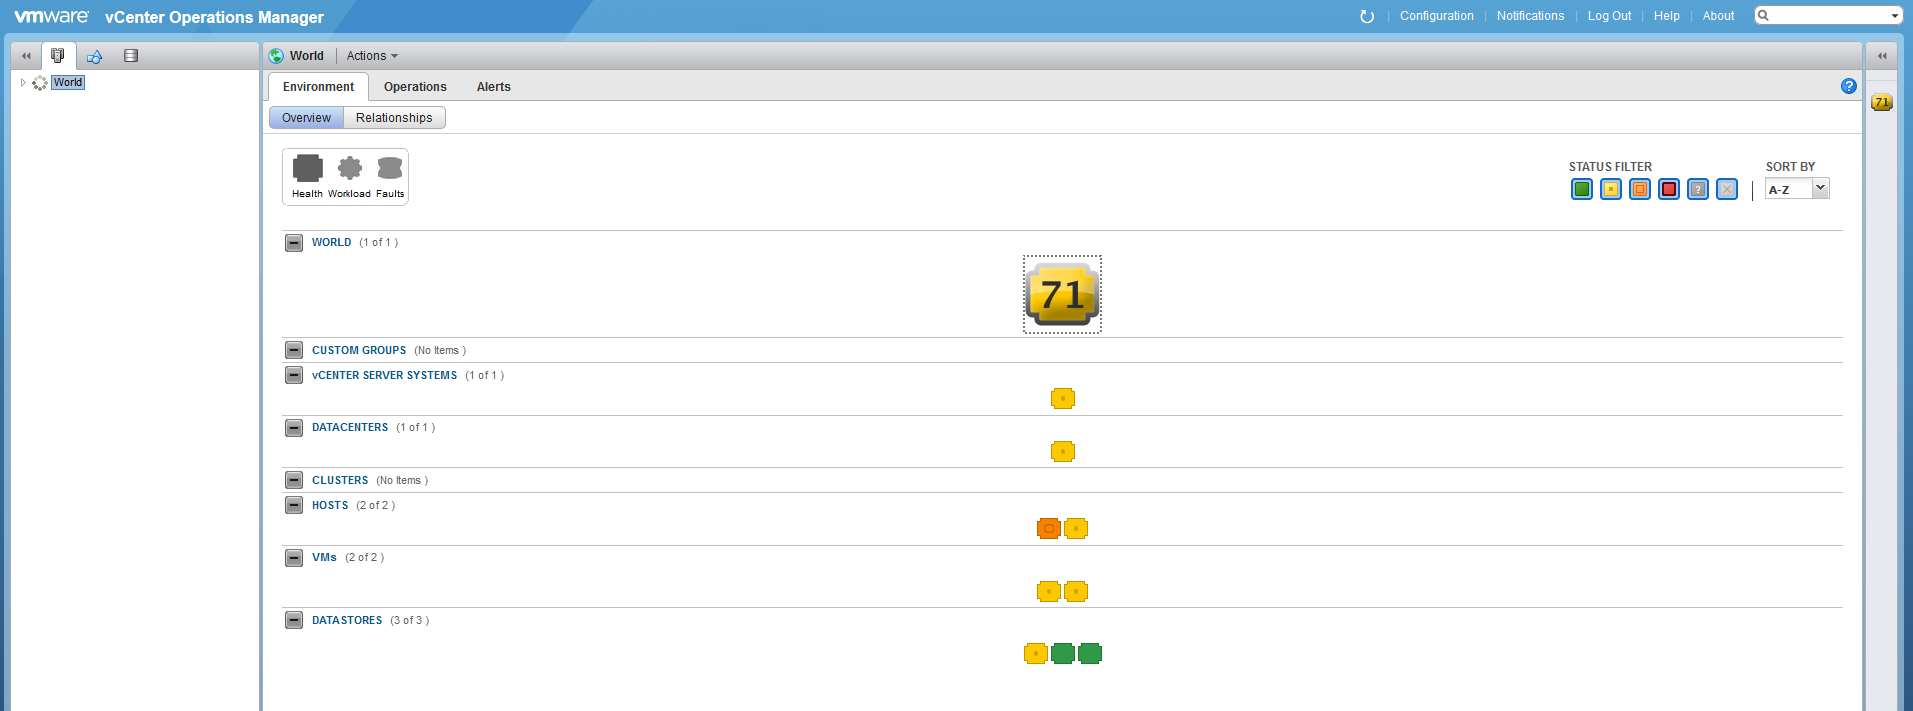
New Intuitive Operations Dashboard – Along with the new user interface and customizable dashboards, the analytics engine provides even deeper views into health, risk and efficiency. Here’s a quick glance of the new UI:

vROps UI

Smart Alerts function – Along with the predictive analytics with dynamic thresholds that vCOps has been known for, vROps adds on the additional value of Smart Alerts. When a problem arises in the environment, these alerts consolidate various metrics and plainly state what is wrong, what the underlying cause is, what resources are impacted, and actions to take to fix it.  It will provide actionable recommendations along with one-click action buttons for immediate remediation of the problem!

Dependency mapping – vROps will map infrastructure services to applications and leverage the analysis of these application dependencies for quicker root cause analysis.

Advanced capacity modeling with capacity planning and project management – Put together “what if” scenarios, not just for the vSphere objects, but also physical infrastructure and application metrics.

Policy-Based Automation

Correlation of change events to performance impact – vROps will monitor changes in performance and map them back to recent configuration changes in the environment. Another feature that will simplify problem resolution and/or prevention.

Automated capacity optimization – Automatically rightsize VMs to reclaim idle resources as well as leverage “what if” scenarios to optimize future growth and deployments.

Guided remediation and automated workflow triggers – Smart alerts will provide recommended actionable remediation steps, and automated remediation workflows can also be configured based on specified thresholds. Imagine alerts triggering corrective action to keep the data center within proper configuration, compliance and performance standards.

Flexible policy management – Apply custom policies for specific workloads, applications and clusters. Apply higher priority policies to critical infrastructure.

Unified Management

Scale-out and resilient platform – This is a more robust solution than its predecessors allowing ability to scale to larger environments as well as failover and replication capabilities for higher resiliency.

Unified UI to manage vSphere and non-vSphere environments – Single pane of glass visibility into all areas of cloud, virtual, and physical infrastructure, whether vSphere, Hyper-V and Amazon. Also extends the use of management packs for various hardware and software platforms.

Application, database, and OS monitoring – Visibility into all areas of the software side of the environment, from the hypervisor down to the guest OS and resident applications.

Storage analytics and unified storage visibility –See the impact of storage infrastructure changes on the application, thus further enhancing the ability to resolve problems quickly and determine storage capacity and performance restraints.

Third-party management packs – As stated above, vROps extends the use of management packs for third party applications like Microsoft server applications, SAP, Oracle, Hyper-V, Amazon as well as hardware and software platforms. It truly offers the unified operations management suite.

Integration with VMware’s cloud management stack – From Log Insight to vRealize Automation, to vCloud Air, vROps continues to build on VMware’s broad management platform for efficiently managing the entire cloud environment.

I’m eager to dig into each of these new features and discover the impact this new vRealize Suite will have on our environment as well as our customers’.

Here are a few quick links for further exploration:

vRealize Operations Manager product page

vRealize Operations Manager 6.0 software download

Free 60-day evaluation download

vRealize Operations Manager 6.0 release notes

vRealize Operations Manager 6.0 documentation

vRealize Operations Management Suite documentation

Take a test drive on the Hands-On Lab, HOL-SDC-1401-HOL Cloud Management with vRealize Operations

Advertisement

vCOps Part 3: Upgrading the vCOps vApp

Upgrading vCOps is relatively straightforward, but can be a lengthy process.  Since VMware recently released minor update 5.8.3, I thought this would be an ideal time to share the procedure for upgrading the vApp.  As an added treat, I’ve also included the procedure for upgrading the underlying operating system for the vApp as this latest version requires SUSE Linux Enterprise Server 11 SP3.

The release notes for the vCOps 5.8.3 vApp can be found here. (Installable version can be found here). These notes contain all necessary details regarding new features, prerequisites, upgrade procedures, and known issues.

As a warning, since upgrading to the 5.8.3 vApp requires upgrading the underlying SLES operating system, additional downtime will be required.  Plan accordingly.

Please also note, the following procedures apply to the vApp only, as in my previous posts.  Please see VMware’s documentation here for upgrading the installable version.

Upgrade the vCOps vApp

1. Take snapshots of the UI VM and Analytics VM.  These can be deleted after the successful upgrade.

2. Download the VMware-vcops-5.8.3-2076729.pak file from the VMware vCOps 5.8.3 download page.  A my.vmware.com login is required.

3. Log in to the Administration portal of the vCOps app (https: //<IP address of UI VM>/admin), using admin credentials.

4. Click on the Update tab in the Admin portal and click on the Browse button under the Update package section.  Browse to the .pak file downloaded in Step 2 and click Open.

upgrade1

5. Click Update to open the update dialogue window.

6. Click OK to confirm the update.

7. Wait for the file to upload.

8. Accept the terms of the EULA and click OK.

9. Click OK to confirm the update.

10.  Wait for the update to complete.  The admin page will likely refresh and kick you out.  You might get the following message:

“The web server is not yet available.  You will be re-directed when service is available.”

Once the web server is available again, the site will automatically refresh and the logon page will reappear with a warning that the update is still in progress.  Log in to monitor the progress.upgrade2

11.  Monitor the update progress…<yawn>

upgrade3

12. This process may take a long time.  You will receive the following message when the update is complete:

Last update completed successfully

13. At this point, both the admin portal and the Analytics/UI VMs will show the new version:

upgrade5

upgrade6

14. You might need to reapply the vCOps license file in vCenter Server, otherwise functionality might be reduced.  In my case, functionality appeared to be unchanged and I confirmed that the license level under the Registration tab was unchanged.

15. If the license has to be reapplied, the services must be restarted.  Go to the Status tab and click on the Restart button.

16. At this point, open the vCOps UI portal and verify proper display and functionality of the upgraded vCOps environment.  Clicking on the About link in the upper right corner will also confirm the version number.

Upgrade the OS to SUSE Linux Enterprise Server (SLES) 11 SP3

VMware declares this step as necessary to run the latest version of vCOps 5.8.3 vApp.  The 5.8.2 vApp was shipped with SLES 11 SP2 so apparently Service Pack 3 is required to fully support 5.8.3.

1. Verify that vCOps 5.8.3 upgraded successfully.

2. Backup or take a snapshot of the Analytics and UI VMs.

3. Log on as root to the UI VM console.  The root password should have been created during the initial installation of the previous version.

4. Check the root password expiration date by running the following command on the UI VM:

chage -l root

Verify the password will not expire during the upgrade process.  If it does, change the password prior to the upgrade.

5. Download the SLES 11 SP3 .pak file (VMware-vcops-SP3-2069574.pak) from the VMware vCOps 5.8.3 download page and copy the file to /data drive on the UI VM.  I used WinSCP for this step.  The file is 3.2 GB so make sure you have the disk resources to copy this into the vApp.  The vApp should have been provisioned with plenty of space, but confirm the sufficient disk space on the underlying physical disk if the vApp was thin-provisioned.

6. Run the following command on the UI VM to start the upgrade process:

/usr/lib/vmware-vcops/user/conf/upgrade/va_sles11_spx_init.sh /data/VMware-vcops-SP3-2069574.pak

This will upgrade both the UI and Analytics VM.  Upgrade will start on the Analytics VM and then the UI VM.  The message, “INIT: version 2.86 reloading” will appear during the upgrade process on each VM.  The entire process can be quite lengthy.  The upgrade process is complete when the command prompt returns on the UI VM console.

7.  Restart the vCOps vApp.

8. Log back into the vCOps User Interface to verify the service is back up and running.

Upgrade is complete!

vCOps Part 2: Configuring vCOps for vCenter

In Part 1, I walked through the procedure for installing vCenter Operations Manager. In Part 2, I will walk through initial setup configuration steps to allow full integration with your vSphere environment.

  1. Open the console for the UI VM within the vC Ops vApp. You will see a similar screen as this. Note the IP address is the one that was defined when you installed vC Ops. This will be the IP address used to configure the admin settings in the next step.Config-console
  2. Open the vCenter Operations Manager Administration web interface. This can be accomplished using one of the following two methods:
  • Click on the link within the Getting Started tab of the vCenter Operations page of the vSphere Web Client. Clicking on “Open vCenter Operations Manager” for the first time will take you to the Admin interface.Config-UI– OR –
  • Point your browser to https://{address of UI VM}/admin.

3. Accept any security exceptions.

4. Login using the default credentials: username: admin, password: admin.Config-adminlogin

5. Once you successfully log in, the Initial Setup Wizard will launch. Type in the IP address or FQDN of the vCenter Server that’s hosting the vApp. Then type in the credentials for an account that has administrative access to vCenter. Make sure the Analytics VM is the correct IP address. Click Next.Config-hostvCenter

The virtual appliance will update details for a few moments.Config-updatevapp

6. Click Yes to trust the server if prompted for a security alert.

7. Change the default passwords. Remember, for the admin account, the current password is “admin”. For the root account, the current password is “vmware”. The admin account is used for the admin interface while the root account is used for command line use on the vC Ops virtual appliance console. Note the strong password requirements. Click Next. It might take a while to change the root account password.Config-changepass

8. Type in the required information for the vCenter access. The registration user is a user account that ideally has administrative access to vCenter. Click Next.Config-monitorvCenter

9. This will validate the vCenter access settings and if successful, advance to the next screen. Click Next.Config-validatevCenter

10. It will also check for any other vCenter servers linked to this instance of vCenter. Click Next.Config-nolinkvCenter

11. Click Finish to register the vCenter Server instance. This could take a few minutes.Config-registervCenter

12. When the registration is completed successfully, you will see the following screen. At this point, vCOps is successfully configured.Config-success

13. You can now navigate to the web address of the vC Ops UI: https://{address of UI VM}/vcops-vsphere. Or you can click on the same link within the Web Client, “Open vCenter Operations Manager”.Config-UIlogin

14. Login with the admin credentials you supplied earlier.Config-vCOpsUI

If you’re like me and trying to build this out in a small lab (ie, a laptop!), then you might get some frightening numbers on initial launch of the application. Not to fret. These numbers will likely stabilize as vC Ops learns the environment and determines what is considered “normal” range.

OK, vC Ops is now up and running. Start exploring the dashboards, charts, alerts, badges, etc. It is a fun product to explore since there is so much packed into this product. Next time I will discuss the major badges.

vCOps Part 1: Installing vCenter Operations Manager

The following is a Quick-Start guide for installing vCenter Operations Manager. It is a very straightforward setup, but it does have a couple preliminary steps, which will make the installation go much smoother. This article is written for vC Ops version 5.8.2 using the vSphere Web Client.

Install the VMware Client Integration Plug-in 5.5.0

When using the Web Client, the VMware Client Integration Plug-in is required for both deploying OVF’s as well as accessing VM consoles. If you haven’t already installed this, do it now before proceeding. I found the easiest way is to click on the link in the Web Client logon screen below the username and password fields. Follow the prompts and accept all defaults. You will be instructed to close the browser window. Upon completion, launch the Web Client again and choose to allow the plug-ins when prompted. You might even need to close the browser once more after changing the security settings. Once the link to “Download and Install the VMware Client Integration Plug-in” is gone, you are ready to proceed.

Configure the IP Pool

vCenter Operations consists of two VM’s deployed as a vApp. In order to prepare for the network configuration of the vApp, we must first set up the IP Pool.

  1. In the Inventory pane of the Web Client, click on the Datacenter object and then click on the Manage tab in the Content pane, and then click on Network Protocol Profiles. Then click on the “+” icon in the Network Protocol Profiles content area.IP Pool
  2. Enter a name for the IP Pool and choose the associated network. This will be the network that the VM’s of vC Ops will reside in.IPPool-NameNetwork
  3. Enter the network address for the corresponding network along with the subnet mask, gateway and DNS server addresses. There is no need to enable the IP pool.IPPool-IPv4
  4. At this point, you can configure IPv6 or other network configurations, but these settings are not necessary.
  5. Review the Summary information and then click Finish to complete. You will now see your Network Protocol policy in the Web Client window:IPPool-ConfiguredSettings

Deploy the OVF Template

  1. Initiating the Deploy OVF Template wizard for vC Ops can be done using either method below:
  • From the home screen on the Web Client, click on the vCenter Operations Manager icon and then click “Deploy vCenter Operations Manager”.

–OR–

  • Right-click the host that you’ll be deploying the vApp to and click “Deploy OVF Template.” Note: I discovered it’s quicker to use this option if you already downloaded the OVF template from VMware’s website and have the file saved to a local folder easily accessible from the Web Client.
  1. If you get the following prompt, uncheck the “Always ask before allowing this site” checkbox and then click the “Allow” button.DeployOVF-SecuritySetting
  2. The Deploy OVF Template wizard will launch. If you initiated the deployment using the vC Ops icon, the Source will automatically be pre-populated with the URL of the download file on VMware’s website. You will just need to supply the credentials for your my.vmware.com profile. Note: If you opted to right-click the host and click “Deploy OVF Template” in Step 1, you will have the option at this point to either download the OVF straight from VMware’s site or browse to the location of the file if you already manually downloaded it.DeployOVF-SelectSource
  3. Review the details and click Next.DeployOVF-ReviewDetails
  4. Accept the EULA. Click the Accept button and then click Next.DeployOVF-AcceptEULA
  5. Type a name for the vApp and then choose a folder or datacenter object to deploy the template.DeployOVF-DestNameFolder
  6. Select the size of deployment.DeployOVF-SizeDeployment
  7. Select which host to deploy the template.DeployOVF-SelectHost
  8. Select which datastore and virtual disk format to install the template. Keep in mind that if you choose “Thick Provision” for the disk format, you will need 384GB of disk space. Thin provision only requires 3.8GB.  If storage policies are enabled, you will also have the option to select the policy. DeployOVF-SelectStorage

After clicking Next, you might get the following error:  “A connection error occurred.  Verify that your computer can connect to vCenter Server.

This is likely caused by a DNS issue or firewall setting. I ended up running the deploy template wizard directly from the vCenter server to get around this error. I obviously had a network issue somewhere that would ideally need to be resolved. For our purpose, my workaround was sufficient.

  1. For IP allocation, choose Static or DHCP depending on your environment. Verify the destination network settings.DeployOVF-SetupNetwork
  2. The next screen will allow minor customization. You might get prompted for invalid settings. If so, just manually change the time zone and IP address settings to match your environment.   The IP addresses will be the specific IP addresses you allocated each of the two VM’s that make up the vApp.DeployOVF-CustomizeTemplateError
  3. Review the settings in the last screen and then click Finish.  You will notice the task is running in the Recent Tasks pane on the right.DeployOVF-RunningTask

Tip… I had a problem deploying directly from VMware’s site. The Deploy OVF template task hung at 35%. I ended up having to cancel the task and then manually deploy after downloading the OVF template first (Option 1.b. above). I found it easier and faster to deploy after already downloading it – it took about 3 ½ minutes to deploy that way!

In the inventory pane, you will see the vApp with the two vCenter Operations VM’s: Analytics VM and UI VM.

DeployOVF-vAppInventory

Clicking on the vC Ops vApp will display the vApp properties in the Content pane.

DeployOVF-vAppContent

Power on the vC Ops vApp

  1. Once the deploy task is completed, you will need to power on the vApp. Right-click the vApp and click Power-On. No need to manually power on each individual VM. The start-up of each VM is controlled by the vApp settings. It will take a few minutes to fully power on the entire VM. Once this has been completed, vC Ops will be ready for initial configuration, which is covered in the next post.ConfigvApp-Startup
  2. While you are waiting for the VMs to start up, right click on the vApp and click Edit Settings.  Note the start order.  Since this is a vApp, it is configured with a very specific start up order and actions.  This can of course, be customized to your environment.

Part 2 of this series will cover the initial configuration of vC Ops to allow it to integrate with vCenter.

Tour of VMware’s vCenter Operations Manager

As a former network operations guy, I came to depend on the ability to monitor systems, view capacity and performance metrics and have all relevant information at my fingertips when troubleshooting. As a VMware administrator, it was ideal to have all this information in one place. That’s why I came to love VMware vCenter Operations Manager (vCOps) – the one monitoring solution built by the engineers who built the cornerstone virtualization platform in most enterprise environments today.

Sure there are other monitoring solutions out there for vSphere – some much simpler than vCOps – but the depth of visibility, gathered metrics, capacity planning and reporting gained by vCOps make it a hard-to-beat solution. Of course with the exhaustive array of graphs, tables and dashboards, it can be a bit intimidating and might even send some folks off to those simpler solutions. For this reason, I decided to provide an online tour of the features and capabilities of VMware’s robust solution and show how to maximize its usage. This will be a series of posts published over the next few weeks, the first of which will be a quick start guide to installing vCOps and getting it up and running. Before I publish that post, however, here is an extensive list of official VMware resources as well as some other fantastic resources provided by folks in the community to get anyone started. Hope you find this useful.

Downloads

Product and Support

VMware Training

Third-Party Resources